Angular ControllerAs Syntax
Angular Controller
For the purposes of this article, we’ll be discussing Angular 1 and not Angular 2.
In Angular, the controller is a constructor function. This controller is used to create a controller object, that adds properties to the scope of an attached view model. Normally, this is represented by Angular’s injectable $scope object. Views are represented by DOM elements being rendered on the page. A view is typically bound to a model, and displays data dynamically based on the data in the model. $scope is a representation of the view model and can be replaced using a variable bound to the context of this. View model is often shortened to vm in applications. A controller can be assigned to a view by applying a ng-controller tag or specifying the controller in the router settings.
Eliminating $scope
Re-factoring code already using $scope is a quick way to see how easy it can be to implement this style change in your own work. To re-factor an existing controller you must:.controller('LinksController', function ($scope, Links) {
$scope.data = {};
$scope.updateLinks = function() {
Links.getAll()
.then(function(links) {
$scope.data.links = links;
});
};
- Remove the $scope being injected from the calback function’s arguments.
- Declare a new variable controllerVm and set it equal to
this. This will capture the context of thethisbinding to prevent unexpected context changes. - Place all properties previously on $scope onto the newly created view model object. Find and replace works great in this scenario.
.controller('LinksController', function (Links) {
  var LinksVm = this;
  LinksVm.data = {};

  LinksVm.updateLinks = function() {
    Links.getAll()
    .then(function(links) {
      LinksVm.data.links = links;
    });
  };
controllerAs
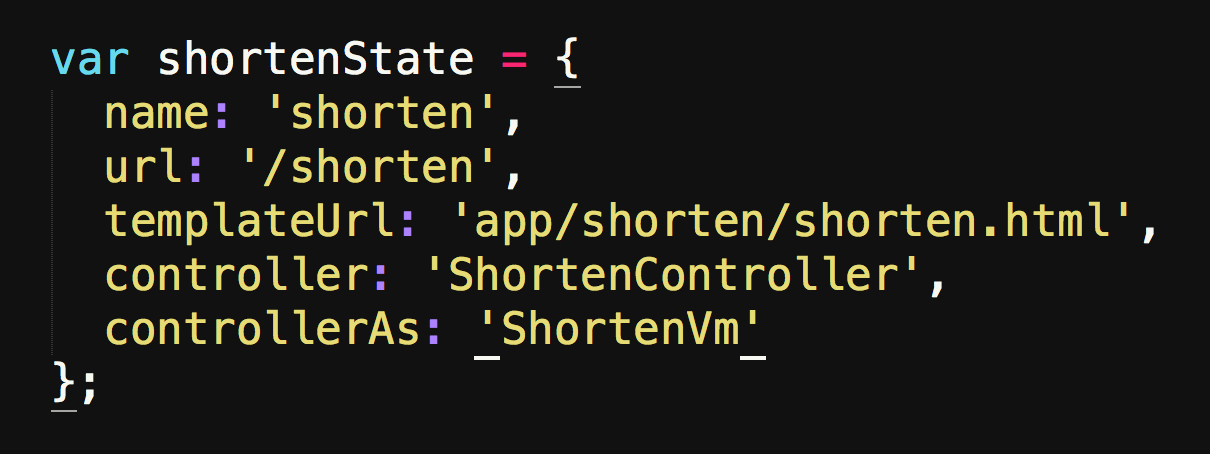
Firstly, we’ll look at adding a view model using a router. I’m a big fan of ui-router for my Angular routing, and I’ll be covering that in this tutorial. If you’re not familiar with ui-router, you can also use this same syntax in the route settings for ng-route.
Normally, your routing in ui-router might look something like this:
Using controllerAs, you can assign a specific view model as the controller for the view:
‘ng-‘ tags
Generally, best practice is to assign the controller and controllerAs inside of your $stateProvider settings, but this assignment can also be made directly in the HTML. On the desired view, just modify your existing ng-controller attribute to specify controllerAs, like below.
Touch Up Your HTML
Finally, any properties previously on $scope are now attached to the specified view model. You’ll need to edit your attributes within the HTML files associated with this controller to point to the correct properties. Once this is done, you should have completed your re-factor to using a view model. If something is not working, make sure that you have :
- Created a new variable, such as FooVm, and set that equal to the current
thiscontext. - Removed $scope from the callback function being passed to the controller.
- Added all properties previously on $scope to the FooVm
- Set up a controllerAs property either in $stateParams OR in your view, not both
- Placed the FooVm using dot notation on the properties in your HTML previously on $scope
Benefits of Using controllerAs
Using controllerAs doesn’t come with any astronomical benefits to your code by itself that would make it otherwise terrible code, but it greatly improves readability and understanding to your code. ControllerAs sits well with Javascript developers because it looks like a Javascript contructor, and it eliminates some of the confusion around understanding $scope. Using a view model will also provide clarity when deciding if methods should go in a controller or a factory. Be consistent with your naming conventions of view models, and avoid directly using this to bind controller methods. Each controller should only be assigned to one view and should be as specific and clear as possible.
Stay tuned for an accompanying post on directives and improving your Angular skills further!
Below are some additional resources for Angular and this style, happy coding!


